Building a speed bag platform
So I wanted a speed bag platform. I needed it adjustable so my wife can use it too. I wanted it sturdy and to not have vibration, wiggle, or bounce around.
I looked online at all the platforms available and none that were affordable would be easy enough for my wife to adjust. So I set out to build one myself.
I started off with a piece of butcher block countertop. I cut it in half so I had two pieces that are approx 24”x24”. I predrilled the holes on what would be the top. I drilled the holes large enough in diameter so the threads wouldn’t catch the top board and only the bottom piece. This will suck the two pieces together much tighter, and create a great lamination.
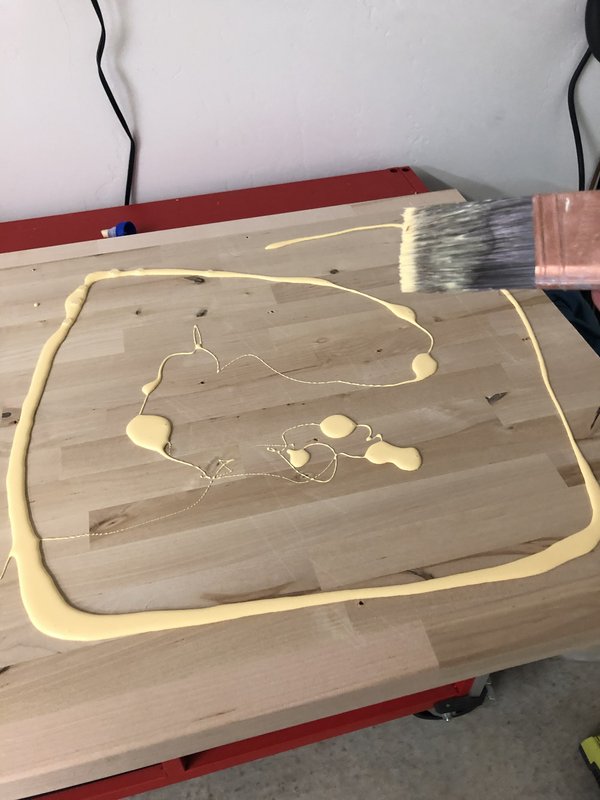
I grabbed an old paintbrush and a bottle of tight bond wood glue, and painted both surfaces with glue. I placed the top on, lined up the edges well, and sunk twelve Spax screws into it, squeezing it really tight.
I threw a few clamps on it just because. I doubt they did much, but it made me feel better.
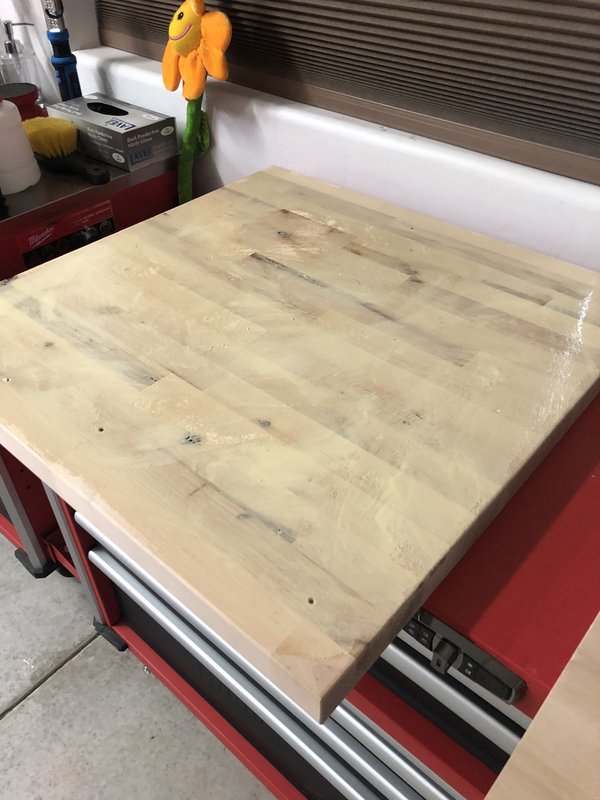
A few days after this, I whipped out the belt sander and took the edges down so the seam became invisible. (This step is best to do outdoors, as it makes an atrocious mess. My wife is still unhappy about the dust in the garage.)
***Important note here, anywhere you see a knot, put a big dot of tight bond glue over the knot. Poke it into the knot with a needle or something like that. Scrape the excess off and when dry sand it lightly.
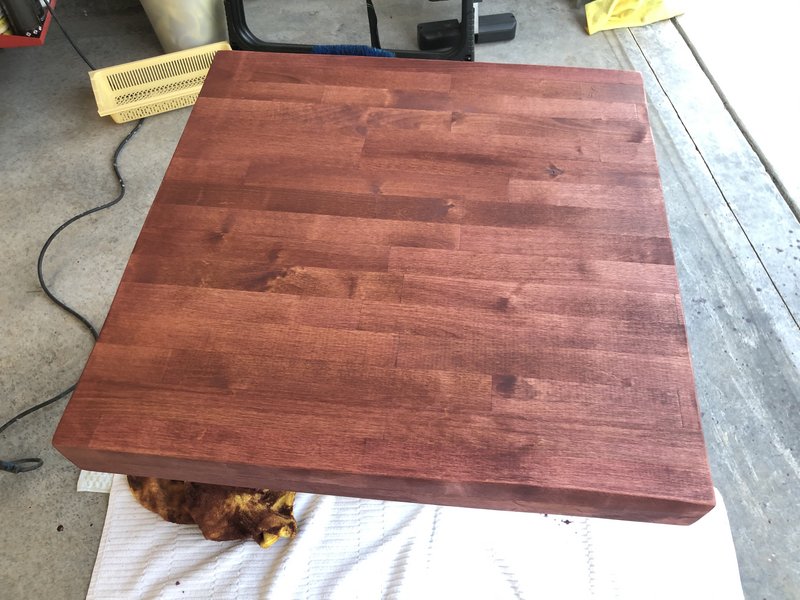
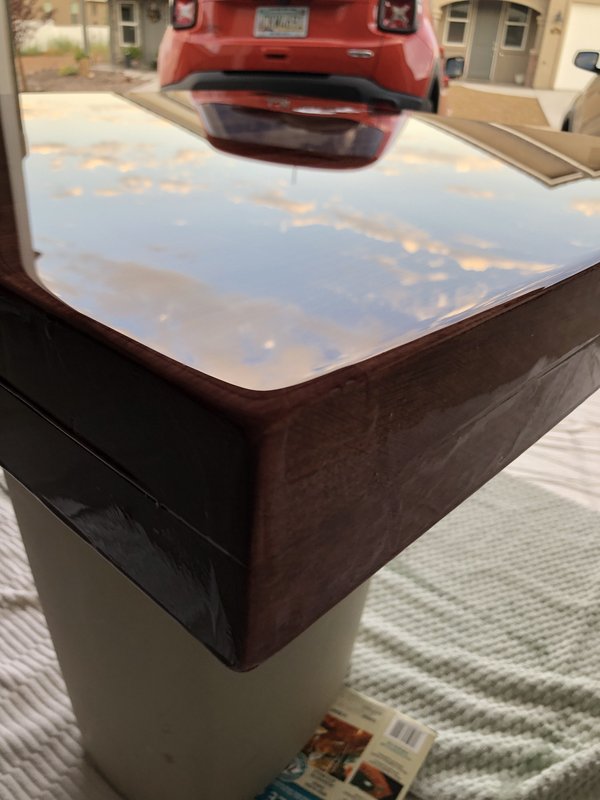
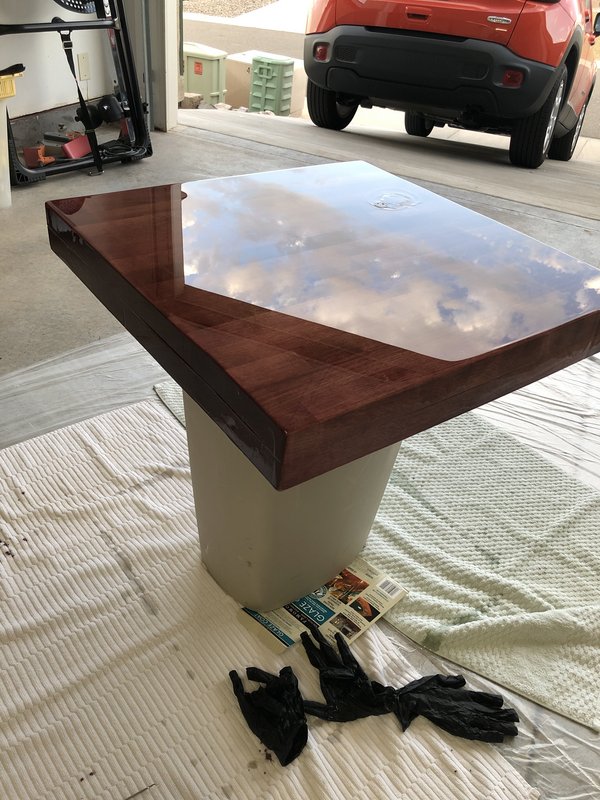
Next came some wood stain. I used a foam brush and painted it in. I let it sit for a few minutes and wiped it off with a towel. I let that dry for two days and then decided to coat it with glaze coat. As far as the glaze coat, just follow the instructions to the letter. It’s pretty easy.
Now I have a big blemish on mine, because I didn’t glue the knots and one kept bubbling. I kept hitting it with a torch and ended up scorching the glaze coat, picking off the top layer and adding more. So, if I could go back, I think I could have done it a little better, had I known what I know now.
So now the wood top is done. Next comes the bracket that mounts to the wall. I used some 1.5”x3” tubing for the arms. This was pretty heavy gauge. The walls are about 1/8” thick. The upper supports are 1.5” square tube with a double angles coped on them.
On the wall side the upper tubes mounted to a 3/16” plate that spans between the two. The lower arms have 6”x6” plates to mount it to the wall.
Where the four pieces of support are tied together, we welded them to another 1/4” plate that is 6”x6”.
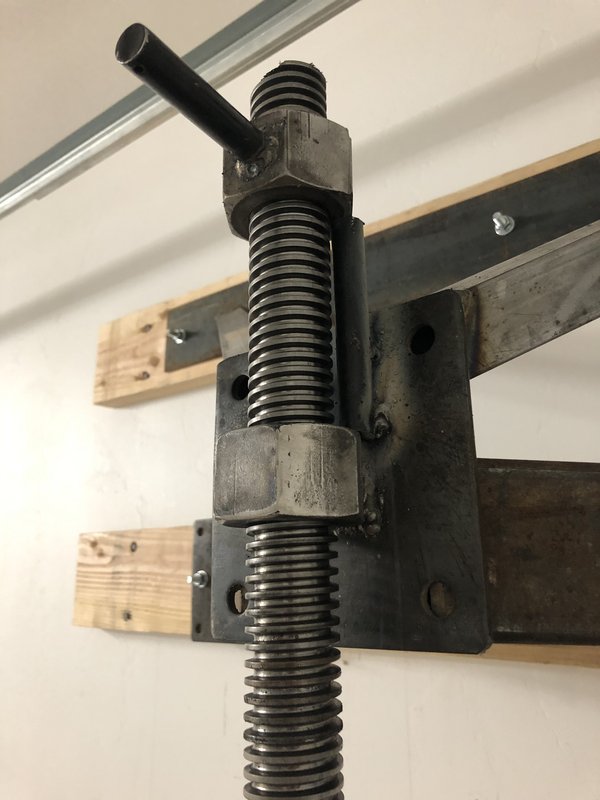
For adjustment, we used a 1.5” Acme screw. I picked up three large nuts to go with the screw. One of the nuts is welded to the 6x6 plate and another is used as a jam nut. I wanted the nut that supports the weight to be centered on the 6x6 plate. we welded a piece of round rod to the bracket and that’s what the jam nut jams on.
We took a piece of 1/4” plate steel that was 12x16. In the center of that plate, we welded the third nut. This is what attaches the Acme screw to the wooden platform. We used carriage bolts that are countersunk to attach the plate to the wood.
We drilled out some holes in the plates, and through a couple 2x6 boards. With carriage bolts we attacked the metal pieces to the 2x6. We then lifted this whole thing to the wall, and attached it to the studs with Ledger Lock bolts. It spans four studs and is attached to all of them.
Plenty of pics below as to each step of the process, and the completed project.


So I wanted a speed bag platform. I needed it adjustable so my wife can use it too. I wanted it sturdy and to not have vibration, wiggle, or bounce around.
I looked online at all the platforms available and none that were affordable would be easy enough for my wife to adjust. So I set out to build one myself.
I started off with a piece of butcher block countertop. I cut it in half so I had two pieces that are approx 24”x24”. I predrilled the holes on what would be the top. I drilled the holes large enough in diameter so the threads wouldn’t catch the top board and only the bottom piece. This will suck the two pieces together much tighter, and create a great lamination.
I grabbed an old paintbrush and a bottle of tight bond wood glue, and painted both surfaces with glue. I placed the top on, lined up the edges well, and sunk twelve Spax screws into it, squeezing it really tight.
I threw a few clamps on it just because. I doubt they did much, but it made me feel better.
A few days after this, I whipped out the belt sander and took the edges down so the seam became invisible. (This step is best to do outdoors, as it makes an atrocious mess. My wife is still unhappy about the dust in the garage.)
***Important note here, anywhere you see a knot, put a big dot of tight bond glue over the knot. Poke it into the knot with a needle or something like that. Scrape the excess off and when dry sand it lightly.
Next came some wood stain. I used a foam brush and painted it in. I let it sit for a few minutes and wiped it off with a towel. I let that dry for two days and then decided to coat it with glaze coat. As far as the glaze coat, just follow the instructions to the letter. It’s pretty easy.
Now I have a big blemish on mine, because I didn’t glue the knots and one kept bubbling. I kept hitting it with a torch and ended up scorching the glaze coat, picking off the top layer and adding more. So, if I could go back, I think I could have done it a little better, had I known what I know now.
So now the wood top is done. Next comes the bracket that mounts to the wall. I used some 1.5”x3” tubing for the arms. This was pretty heavy gauge. The walls are about 1/8” thick. The upper supports are 1.5” square tube with a double angles coped on them.
On the wall side the upper tubes mounted to a 3/16” plate that spans between the two. The lower arms have 6”x6” plates to mount it to the wall.
Where the four pieces of support are tied together, we welded them to another 1/4” plate that is 6”x6”.
For adjustment, we used a 1.5” Acme screw. I picked up three large nuts to go with the screw. One of the nuts is welded to the 6x6 plate and another is used as a jam nut. I wanted the nut that supports the weight to be centered on the 6x6 plate. we welded a piece of round rod to the bracket and that’s what the jam nut jams on.
We took a piece of 1/4” plate steel that was 12x16. In the center of that plate, we welded the third nut. This is what attaches the Acme screw to the wooden platform. We used carriage bolts that are countersunk to attach the plate to the wood.
We drilled out some holes in the plates, and through a couple 2x6 boards. With carriage bolts we attacked the metal pieces to the 2x6. We then lifted this whole thing to the wall, and attached it to the studs with Ledger Lock bolts. It spans four studs and is attached to all of them.
Plenty of pics below as to each step of the process, and the completed project.

Comment